


 Why grow a garden? There are certainly many reasons people grow vegetable gardens, but for LDS families the most important reason may be that we have been counseled to do so by our prophets. That one’s reason enough for me – how about you?
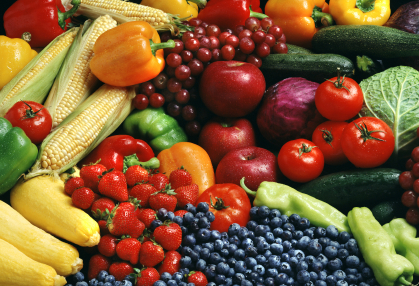
Other valid reasons for growing some of your own food are: loving the taste that only comes from fresh picked-when-ripe tomatoes, corn, peas and etc.; believing it’s the healthiest way to live; and loving the fresh air and exercise, plus digging in the dirt, as well as the joy of being a co-creator of growing things with God.
The idea of having our food grown by strangers on huge farms in far distant places, while perhaps using harmful pesticides and herbicides, motivates many people to want the security and control of growing their own. And at times like 9/11 and the more recent global disasters happening all around us we may all feel vulnerable to disruptions in the complex delivery systems that bring food to our doors.
Let me add to this list the idea that gardening can actually be financially rewarding as well. Using the principles and procedures described below a family can produce a half ton or more of fresh, healthy vegetables on only 1/100th of an acre of land! With today’s prices for things like tomatoes and sweet peppers, etc. that can amount to a few thousand dollars in a space little more than 20′ by 20′.
And now we’re talking about why many of you have not been growing gardens – because it just hasn’t seemed to make financial sense, given your limited time, and the very limited sunny space you might be able to devote to it.
I assure you that you CAN have a successful vegetable garden of your own – in a very small space. And it can be fun, productive, and even financially rewarding! After all, who wants to spend time doing work if the reward does not match the effort?
Successful gardening is really quite simple, and most of the work is actually done for you by nature. All you need to do is learn and follow 10 basic steps as follows:
1. Choose a location away from shade of any kind that’s 1) reasonably level, 2) has a good water supply, and 3) has easy access.
2. Remove everything you can from the soil: trees and shrubs, rocks, rubbish, and other vegetation, including roots and runners of perennial weeds. Then if you’ve decided to grow IN the soil, till or dig everything 8″ to 10″ deep.
3. Plan, stake, and build level ridged soil-beds or Grow-Boxes in which to plant seeds or seedlings. An 18″-wide soil-bed or open-bottom box, with aisles of at least 3′ is ideal, and containers of 4′ wide also work very well to maximize yields in limited space. Make them any length to suit your situation.
4. Assure balanced natural mineral nutrition for your crops. Plants grow by using water-soluble minerals (not manure, compost, red worms or beneficial soil bacteria!) This means you simply need a “pre-plant” mix of calcium, magnesium and boron (80-4-1 ratio), and a complete balanced growing mix of the other nutrients for weekly feeding. The Weekly Feed mix includes 12 nutrients and you can make it yourself for about 1/4th the cost of Miracle-Gro. Simply obtain a package of micro-nutrients at www.growfood.com/ under Materials and mix according to instructions for 60# of natural mineral nutrients.
5. Plant seedlings or seeds at the proper time so they don’t freeze, and space them based on their size at maturity, to give them ample growing room. An excellent Garden Planting Guide gives you all the important details you’ll need, and is available free on the Yahoo Mittleider gardening group or by request from [email protected]. I can’t say enough about this simple one-page schedule as a resource for the home gardener. For every vegetable in your garden it tells you when, where, and how to plant; it includes almost everything you need to know.
6. Immediately after transplanting seedlings, give them a boost with 34-0-0 or other nitrogen fertilizer, such as 46-0-0 or 21-0-0. Apply 4″ from plant stems along the row of plants, using 1/4 ounce per running foot of soil-bed. Water thoroughly.
7. Three days after transplanting, or immediately upon emergence of sprouted seedlings, apply your Weekly Feed growing mix at a rate of 1/2 ounce per running foot of soil-bed or Grow-Box.
Do this weekly, until 3 weeks before crop maturity, or 8 weeks before frost for ever-bearing plants (use the Garden Planting Guide mentioned above).
8. At the first sign of tiny weeds, use a 2-way hoe to remove them. Never let weeds get even one inch high, but continue weeding until they give up. “E and O weeding” (early and often!) will assure you a weed-free garden, along with much more abundant and healthy crops.
9. Water down the center of your level ridged soil-beds or Grow-Box daily or as needed to maintain moisture. Never let the soil dry out, as wilting plants are dying plants!
10. Harvest your crops at the peak of maturity for best appearance, taste, and health benefit. Never leave crops in the garden after maturity, or they will quickly lose their food value and attract bugs and diseases.
Just learn these few basic steps, follow them accurately and consistently, and watch nature’s miracle turn your bare ground into a cornucopia of tasty and healthy fruits and vegetables!
To see the free complete pictorial and graphic basic instructions for a great garden in any soil and in any climate, visit the Learn section on the Food For Everyone Foundation website: https://www.foodforeveryone.org.